Building a PC, Part VII: Rebooting
I’ve had more or less the same PC, with various updates, since 2007. I’ve written about most of it here:
- Building a PC, Part I: Minimal boot
- Building a PC, Part II: Burn in
- Building a PC, Part III: Overclocking
- Building a PC, Part IV: Now It’s Your Turn
- Building a PC, Part V: Upgrading
- Building a PC, Part VI: Rebuilding
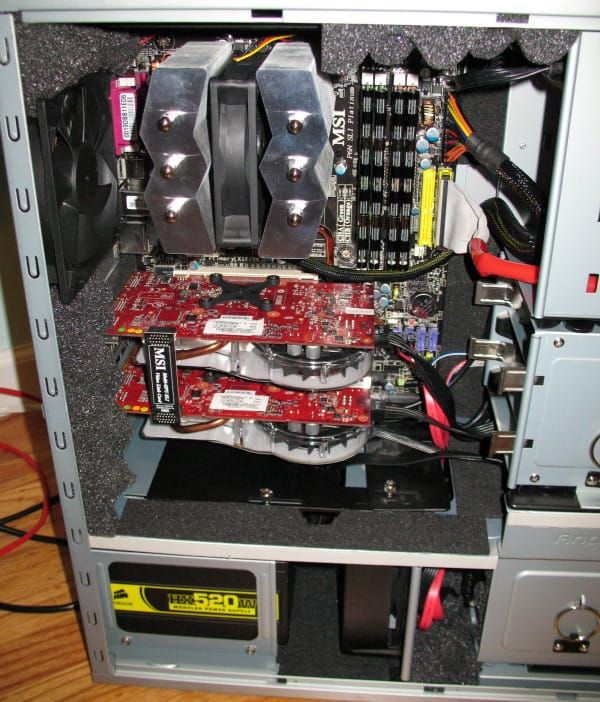
While the advice in those original articles is still quite sound, my old 2007 era case was feeling mighty creaky. I needed a new chassis. I also wanted a motherboard that supported native 6 Gbps SATA for the latest generation of SSDs that truly benefit from them. The buzz around the Sandy Bridge based Core i7-2600k was nearly deafening, and I’ve fallen completely in love with my last HTPC build based on the same technology. (Oh, and even if you already read that article, read it again because I added new PicoPSU and case information that takes it from awesome to sublime – on the order of 17 watts idle!)
So I decided it was time to build myself a nice Sandy Bridge system. What I ended up with is easily the best case and motherboard combination I’ve ever laid hands on. Read on!
I cut out a lot of the initial research work by relying on my old, dear friends at Tech Report and their current workstation recommendations:
- Asus P8Z68-V Pro $220
- Corsair Vengeance 16 GB kit $155
- Core i7-2600K $315
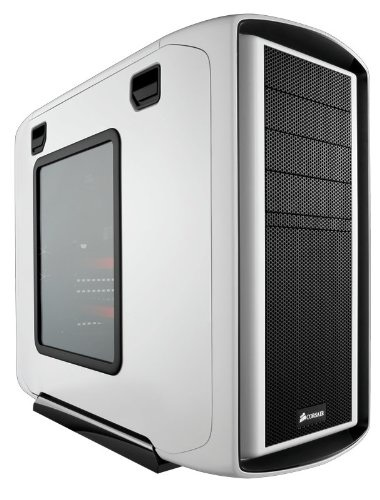
As for the case, I was impressed by the Tech Report review of the Corsair 600T, which even comes in a heart-stopping pseudo stormtrooper white. WANT.
When it comes to power supplies, I’m crazy about efficiency, and fortunately there are now lots of so-called “80 Plus Gold” PSUs out there now, offering a staggering 90% efficiency under most loads. Power supply efficiency is important, because the rest of that heat is dumped back into your case. The less efficient your PSU, the more heat buildup you’ll have under load. I chose the Seasonic X-760 – which, when bench tested, indeed delivered the promised 90% efficiency – but any high quality 80 Plus Gold model will generally do.
The CPU (and possibly, depending on your tastes, the video card) is the biggest heat generator inside your PC. The better and more efficient the CPU cooler, the quieter your whole system can be. This also affects how much you can overclock. I chose the Thermalright Venomous-X Silent Edition on the basis of it being the current top dog for efficiency, and because it had a simple mounting system. Large coolers can be a real bear to install. And did I mention it comes with an especially quiet fan out of the box, too?
Once I had all the parts in hand, it was a simple matter of building it up, as documented in my previous post series. I adore this Corsair case; it is an absolute joy to work in. Everything in it is cleverly designed, from the rear cable routing area with rubber grommets all over the place for easily passing cables back and forth, to the tool-less 2.5" and 3.5" bays, to the super easily removable side panels. It’s like they read a giant list of all my prior complaints with every PC case I’ve ever used and fixed every. single. last. one of them.
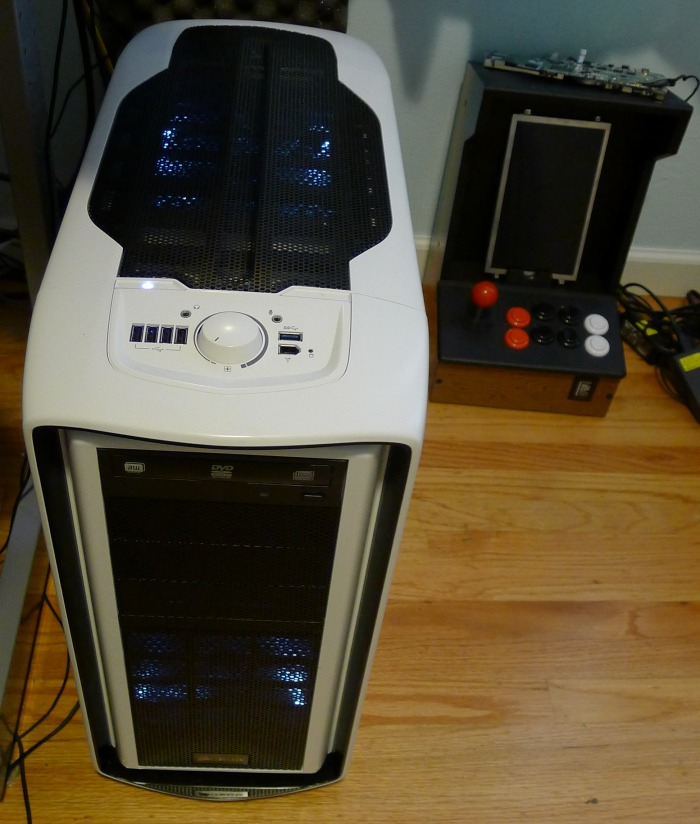
The end result is what you see here:
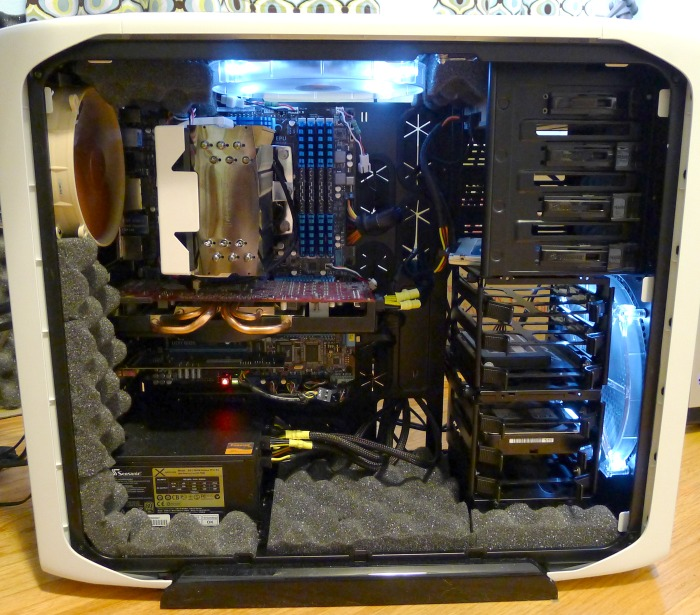
There are some significant tweaks visible in the above picture that I do recommend:
- Use tin snips to remove the rear exhaust grill. We don’t need it back there, and the exhaust airflow is critical. Fan grills affect low-speed fan airflow more than you’d think:
Wire grills also have an effect: ~20%. This was checked with an anemometer on several different fans of 80, 92 and 120mm size, at full and lower speeds. The airflow reduction went as high as 24% but it was never below 19%. At 12V, the reduction in airflow with most fans will be relatively harmless, though there is an increase in turbulence noise (audible to me). But at the low airflow rates SPCR members run fans, I think the airflow reduction is significant.
- Install a 140mm rear exhaust fan. The Noctua NF-P14 is expensive at $25 but is cleverly designed to give you 140mm of super-quiet fan in the space a 120mm fan would normally take. It just barely fits in the rear exhaust fan slot with a little nudging. But it does fit; it’s the beige fan in the above picture. It also comes with its own speed reducers and accessories.
- Use fan speed reducers on all the fans. The case has two 200mm fans, and the 140mm fan we’re adding. I couldn’t get the Asus motherboard’s “QFan” fan control system to work, as it seems to require 4-pin fans, and all the ones I had (including the ones that came with the case) are 3-pin. While I do prefer dynamic, temperature based control when I can get it, the next best thing is to use hardware to slow down the fans. I like the Zalman-ZM-RC56 resistor connector as the simplest solution, but it’s getting hard to find for some reason. The Zalman Fan Mate 2 will also work, and allows you to individually adjust the speed of each fan. The case also has a built in fan controller – that’s the knob you see on the front top – but I found it too limited in range for my purposes.
- Add acoustic foam to taste. Between inexpensive eggcrate foam and thin, adhesive backed open-cell foam, you can easily reduce that last 10-20% of fan noise to a very pleasant white noise. It works well in the areas pictured, and also on the interior of the side panel “facing” the fans. See item 6 in my Building a Quiet PC post for details.
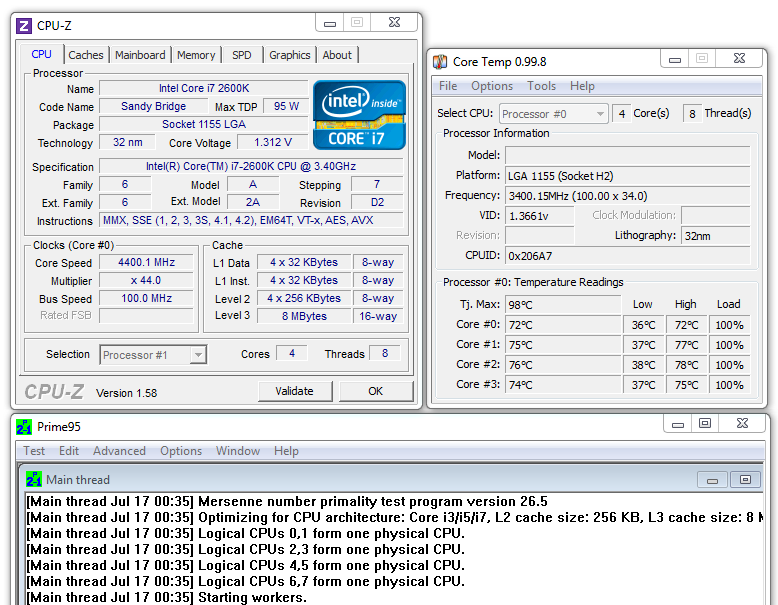
And then, of course, the overclockening. What kind of geek would I be if I didn’t attempt to turn this baby up to 11? This is another area where Sandy Bridge is a revelation: so long as you buy one of the blessed “K” series processors, overclocking is as simple as setting the multiplier to the desired value. It is ridiculously simple. And my results, for once, were immediately as good as the ones everyone else was crowing about: 4.4 GHz totally stable!
(beware: there is one nasty little issue with the Asus motherboard’s auto-overclock feature. The PLL Overvoltage setting, which auto-overclock “helpfully” enables, completely bollixes up resuming from sleep. Just turn it off, and all is well. I don’t even want to tell you how long it took me to figure that one out.)
The total package with a nice SSD delivers a near-perfect Windows Experience score:
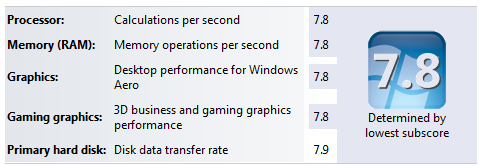
I won’t lie to you. This is not a compact build. It’s big! Those roomy side areas come at a cost, and that makes it a very wide case. But that’s to be expected for a desktop powerhouse machine. And since my last case lasted me from 2007-2011, I’ll happily accept a little bulk for something that’s easy to work on and upgrade over time.
It’s a fantastic new reboot of my system, and I didn’t expect to be this excited about the final result. This is not merely an incremental improvement over what I had, it’s much quieter, easier to work on, and when overclocked to 4.4 GHz, noticeably faster too. (I do slightly mourn the loss of 8 GB of RAM, but I’ll survive.)
In this build, I already had hard drives, DVD drive, a sound card, and so forth… but for completeness’ sake I’ll list everything here if you want to mirror this setup. Realize that some of this comes down to personal taste, so I’m just listing what I recommend. Feel free to change anything out, and bear in mind that Sandy Bridge has decent default onboard video as well.
- Asus P8Z68-V Pro $220
- Corsair Vengeance 16 GB RAM $155
- Core i7-2600K CPU $315
- Corsair 600T Special Edition case $170
- Corsair 850w 80 Plus Gold PSU $170
- Thermalright Venomous-X Silent Edition CPU heatsink $75
- Vertex 3 240 GB SSD $500
- WD Caviar Green 3 TB HDD $170
- Noctua Ultra Silent 140mm Fan NF-P14 FLX $25
- Radeon 6850 triple monitor capable video card $170
Remember, if you can put together a LEGO kit, you can build this totally sweet PC for yourself, too. Good luck and happy building!