Computer Display Calibration 101
If you’ve invested in a quality monitor for your computer, you owe it to yourself – and your eyes – to spend 15 minutes setting it up properly for your viewing environment. I’m not talking about a high-end color calibration, although you can certainly do that. I’m talking about basic computer display calibration 101.
The first piece of advice is essential – make sure your LCD display is connected to your computer via a digital connection.

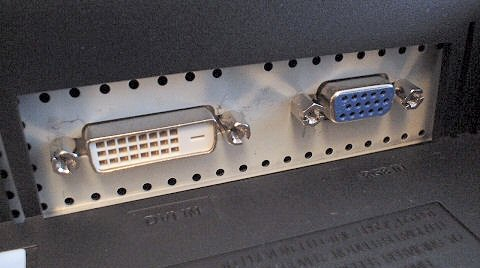
The DVI port, on the left, is the one you want. Avoid using the standard analog VGA connector, on the right. A DVI connection guarantees that your display is sent a pure, digital stream of bits, shuttled directly from your video card with no analog impurities introduced along the way.
In the bad old days of analog CRTs, we had to worry about a whole host of analog issues with the monitor itself, such as convergence, display curvature and geometry, refresh rate, bloom, resolution sizing, and so on. Every time I bought a new CRT, I’d spend a solid hour going through Nokia’s classic monitor test program, adjusting monitor settings to reduce all the unavoidable analog side effects of an electron scanning CRT. It was a tweaker’s paradise.
The good news is that a digitally connected LCD is much closer to perfect out of the box than any CRT ever was. There’s very little tweaking necessary to get it looking its best.
Display calibration probably isn’t anyone’s idea of a good time, but it can be relatively painless. One of my favorite basic display calibration wizards is the one built into Windows Media Center. It’s accessible via Settings, TV, Configure Your TV or Monitor. It’s based on a series of brief, themed video clips that do a great job of explaining why each setting matters without bogging down in display-geek terminology. There are five sections:
- Onscreen Centering and Sizing
- Aspect Ratio (Shape)
- Brightness (Black & Shadow)
- Contrast (White)
- RGB Color Balance
The first two are mostly irrelevant for a digitally connected LCD display, provided you’re running at the native resolution of the LCD display. I’ll assume you are. The last three are the only adjustments that typically matter on a desktop LCD. I’ll summarize each, along with a static screenshot from the video, so you can follow along on your display.
3. Brightness (Black & Shadow)
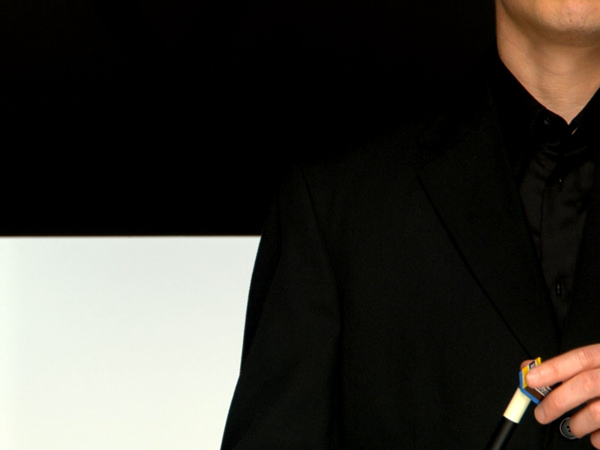
Locate the brightness control for your display. Adjust the brightness, making sure you can distinguish the shirt from the suit. The suit should be black, not gray. If you see a moving X, turn the brightness down until the X just disappears.

On a LCD, the brightness control doesn’t have quite the same meaning as it does on a CRT. If your LCD has a gamma adjustment, that will be more effective at bringing out the nearly-black details on the shirt than increasing the backlight intensity will. Also, if you’re looking for that X, you won’t find it. I had trouble capturing the very dark moving X in my static screenshot for some reason. I’ve seen a very similar calibration technique used in video games which rely on dark environments. The goal is the same – we want to see the deepest possible blacks on our display, without losing details in the darkness.
4. Contrast (White)
Locate the contrast control for your display. Set the contrast as high as possible without losing the wrinkles and buttons on the shirt. Lower the contrast if the white cue stick does not appear straight and smooth.

Digital fixed pixel displays won’t have blooming problems, so you can ignore that last bit about the stick. But you can see where this is a complementary operation to the brightness adjustment we just made – we want to see the brightest white details on our display, without blowing them out.
5. RGB Color Balance
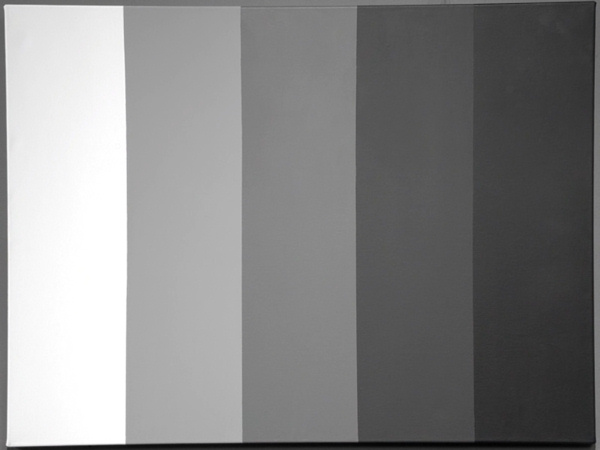
Locate the RGB color balance control for your display. If your monitor has a color temperature setting, set it to 6500k (sometimes called “Warm” or “Low”). Make sure none of the gray bars have a tinge of red, green, or blue. You may need to fine tune brightness and contrast again after adjusting the color balance.

And that’s it. A few minor adjustments to the Brightness, Contrast, and Color settings of your monitor is all it takes to get the most out of today’s LCD displays – to see all the colors, and the entire range of light to dark, that you paid for.
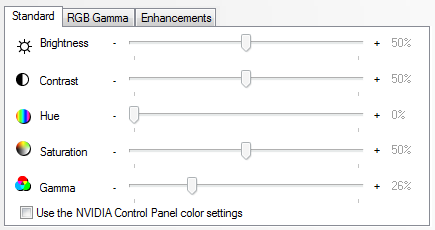
You should always start with the controls on the monitor itself. Unfortunately, some monitors won’t allow you to change the brightness, contrast, and color settings in digital mode. Or perhaps you can’t quite get the precision you need from the monitor’s controls. Most video drivers will allow you to change these settings at the video card level.

Be careful, however, as there are usually two sets of settings: one for video playback, and the other for your desktop itself. I’d avoid changing brightness, contrast, or color settings via the video driver unless you have no other choice. It adds another layer of complexity to an already complex situation.
The general calibration steps for a LCD television are awfully similar to the Windows Media Center wizard I outlined above. But both are still rudimentary. You’ll need to do much more involved calibration for professional color work.
These calibrations are also video-centric. It’s an entirely fair point to note that we are talking about LCD computer displays here, and not LCD televisions. They aren’t the same thing. People spend far more time reading text than watching videos on their computer monitors – and at a distance of two feet, not ten feet. You might find that an optimal brightness for the above test images produces a screen that's painfully bright for workaday reading tasks. This is an important point that’s glossed over in most LCD reviews, but Dan covered it with aplomb in his 30" Dell LCD review:
The minimum brightness setting for the 3007WFP-HC is still pretty bloody bright. The maximum brightness is down a bit from the non-HC model, at a mere 300 candelas per square meter, but that’s still outrageously bright. Not nearly as bright as sunlight on paper, but way brighter than anybody should set a normal indoor desktop monitor.
Ideally, your monitor shouldn’t be any brighter than a well-lit book (something which is probably new to the 60Hz-CRT brigade who, today, don’t know how to adjust their laptop’s screen brightness...). But I can’t turn the 3007WFP-HC down that far. Well, not without opening the thing up and fooling with the backlight power supply or something.
I’ve rigged up a quick-‘n’-dodgy bias light behind the monitor to reduce eyestrain, and JediConcentrate and the Darken bookmarklet help to reduce the number of minutes I spend with millions of bright white pixels tanning my retinas.
Far too much default brightness is easily the number one problem I see on most LCDs these days. Keep Dan’s rule of thumb in mind as you’re adjusting the brightness and contrast on your LCD against the reference images. Most display calibration guides care only about accuracy, not your eyeballs. For reading purposes, your monitor shouldn’t end up any brighter than a well-lit book.


