
Building a PC, Part II
Yesterday, we completed a basic build of Scott Hanselman’s computer. We built the system up enough to boot to the BIOS screen successfully. Today, we’ll complete the build by installing an operating system and burning it in.
The first thing we’ll need is hard drives. The Antec P182 case has a well engineered drive mounting system. The bottom cage holds 4 drives, with soft rubber grommets to support each drive, and more importantly, to isolate the case from transmitted, resonant hard drive vibration noise. After all, they are giant hunks of circular metal spinning at 7,200 to 10,000 RPMs.
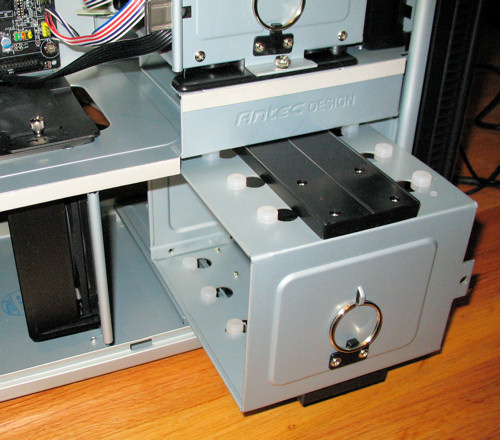
The boot drive is a 10,000 RPM Raptor, which I can’t recommend highly enough. The secondary drive is a run of the mill 500 GB model. I slid them in and secured them using the long screws provided with the case.
I connected two SATA cables and threaded them down to the bottom channel through the center cutout. I snapped a modular SATA power cable into the Corsair HX series power supply, and routed that cable around the back, into the hard drive compartment.
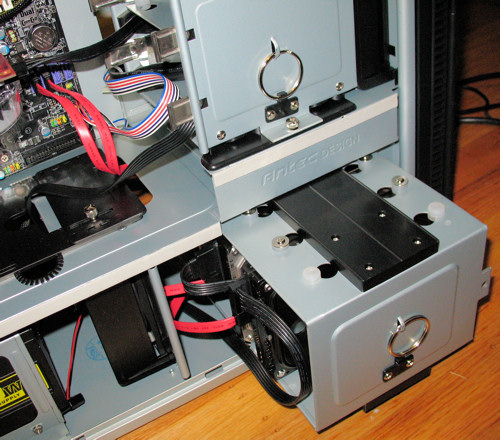
Houston, we have storage!
But we can’t install an OS without an optical drive. Fortunately, DVD drives are dirt cheap; I chose the latest Lite-On DVD drive, in black to match the case. I suppose eventually we’ll be buying HD-DVD or Blu-Ray drives, but until the format war is decided, it’s DVD all the way for me.
The 5 1/4" drive bays at the top of the P182 require the use of rails, which are provided with the case. I find rail mounting annoying, but since we’re only installing a single DVD-R drive, I can deal. It took a bit of trial and error, but I got the rails screwed into each side of the drive and snapped it in to the top bay.

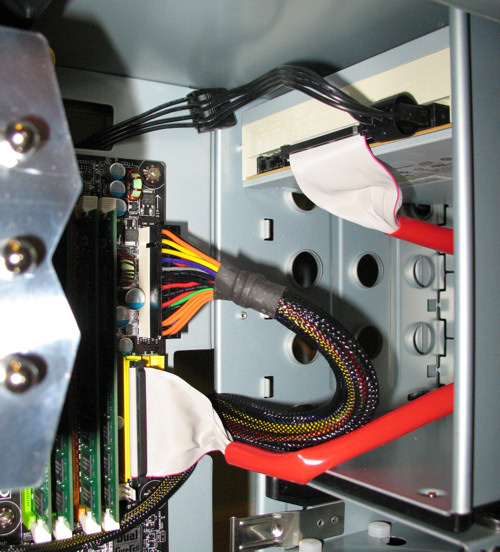
This is not one of those fancy new SATA DVD drives, so we’ll need to break out the old-school Parallel ATA cable included with the motherboard. I snapped in another modular power connector to provide the necessary 4-pin power. As usual I routed the power cable along the back of the motherboard tray to preserve the clean interior layout.
We’re now ready to boot up the machine. Plug in the power cord, connect a keyboard and mouse, then hit the power switch. During boot, press DELETE to enter the BIOS setup screen. Go into the basic settings and verify that all the drives we installed are properly detected by the motherboard.
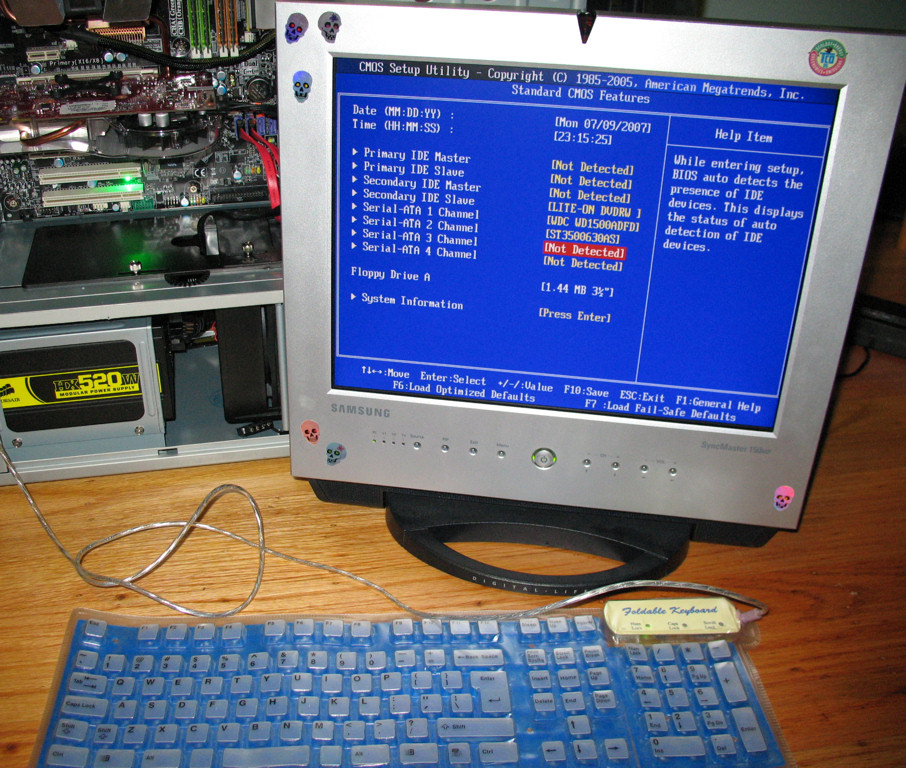
Looks good – all three drives are showing up. From here you may want to adjust a few basic BIOS settings. For example, I always set the floppy drive to “Disabled.” You’ll definitely want to set the boot order to ensure the right drives are booting first – in our case, it’s DVD-R, Raptor, then the second drive. Beyond those basic settings, mucking around in the BIOS isn’t required at this point; we want to test the system with stock settings anyway.
However, do I recommend flashing the motherboard BIOS to the latest version before you go any further. You’d be surprised how often motherboards ship with out-of-date BIOSes. It isn’t required, but your life will be easier if you flash to the latest BIOS now before you complete system setup. A full description of how to flash your motherboard’s BIOS is outside the scope of this article, but here’s the condensed version:
- Check the manufacturer’s website for the latest motherboard BIOS. Be absolutely, positively sure you have the BIOS for the correct motherboard model!
- Copy the BIOS files to a bootable USB Flash drive.
- Boot from the flash drive and follow the instructions.
This is a typical BIOS flash scenario. Some vendors do make it easier, though. On my ASUS P5B Deluxe, the flash program is embedded into the BIOS. Others provide programs that allow you to flash the BIOS from within Windows using a friendly GUI.
At any rate, BIOS update or not, we can now install an operating system. I placed my OEM copy of Windows Vista into the DVD tray, rebooted, and selected a 120-day trial of Windows Vista Ultimate.

Here’s one thing I’ve learned from experience: if your system can’t finish a clean install of Windows, it’s not stable. Period. It’s tempting to blame Microsoft, but the only possible culprit if you have problems at this stage is the hardware (or possibly a scratched DVD). Trust me on this one.
Fortunately, our new system completed the Windows install without a hitch. Remember those driver CDs that came with the motherboard? Throw them right in the trash. They’re way out of date by the time the motherboard gets from the factory, to the vendor, and then finally to you. The MSI P6N SLI motherboard we chose is based on the well-regarded NVIDIA 650i SLI chipset, so we have a one stop shop at the NVIDIA drivers page. I downloaded the 650i SLI platform drivers for Windows Vista x86, and the latest 8600 GTS graphics driver.
Now that we have Windows installed, and our platform drivers firmly in place, we know our system is reasonably stable. But we want to confirm that our system is totally stable.
To do that, we’ll need to download a few essential burn-in utilities:
I run through basic benchmarks first. If the system can’t complete a run of 3DMark or PCMark, it’s definitely not stable. The rig we just built generated these scores:
And of course the obligatory Windows Experience results:
| 3DMark2006 (@ 1024x768) | 7217 |
| PCMark2005 | 7353 |
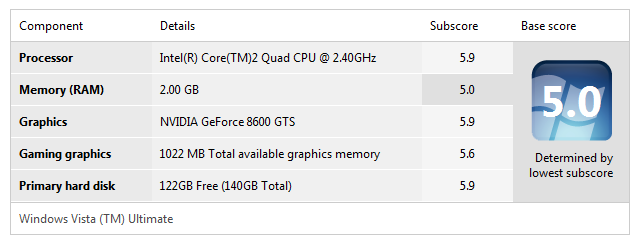
These tests aren’t just for stability; they’re also reality checks. Make sure these scores are in the ballpark for comparable systems. If not, you got something wrong in the build and somehow crippled your system’s performance. Fortunately, these numbers check out (although the memory subscore is suspiciously low), and we didn’t have any crashes or reboots during the benchmark runs. So far so good.
Now for the real torture test. We’ll use:
- Four instances of Prime95 (one per core) to load the CPU
- Real-Time HDR IBL (RTHDRIBL) to load the GPU
- CoreTemp to monitor temperatures
To run four instances of Prime95, create four shortcuts to Prime95.exe using the -A(n) flag, where (n) is the core number. That’s documented in this forum thread. Start with “Small FFTs” on the Options | Torture Test dialog in each instance. Then launch RTHDRIBL in a maximized window, and CoreTemp, as pictured here.

Now we need to monitor our patient during the torture test, at least for the first 30 minutes or so.
I use my trusty Kill-a-Watt to determine how much power the system is consuming. I saw 130 watts at the Windows desktop, and during the extreme CPU and GPU torture test, 220 watts.
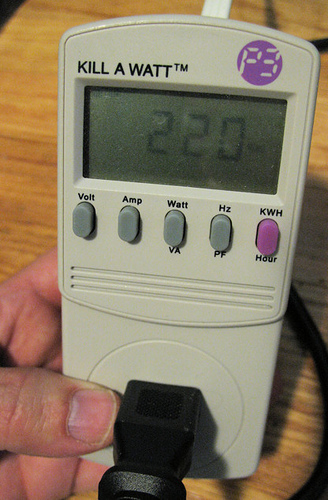
That gives us a rough idea of how much power dissipation, and therefore heat, we have to worry about. I also use my temperature gun to spot check various heatsinks in the system and make sure they’re not getting unusually hot. Here, I’m checking the northbridge heatsink, which gets pretty toasty in modern systems.
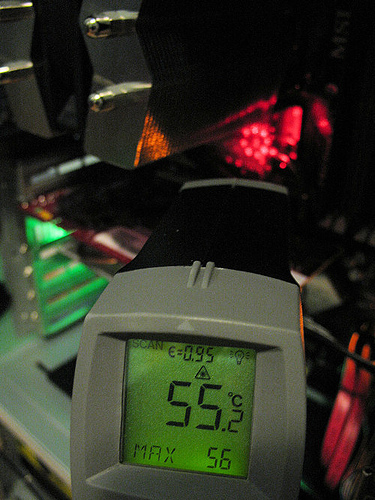
Fancy laser temperature guns are fun, but they’re not required. I often use my built-in Mark I finger to touch various items in the computer (but not the bare electrical components, obviously) and make sure they’re within normal temperature ranges. You might call me “The PC Whisperer”– I love nothing more than getting in there and physically touching everything that’s at risk of temperature damage:
- CPU heatsink
- Northbridge
- Southbridge
- Video card heatsink
- Hard drives
You’ll know you’re in the danger zone when something is too hot to leave your finger on for more than a few seconds. I’m happy to report that all the temperatures on this system check out, both with my temperature gun and my Mk. I finger – even after hours and hours of torture testing.
Looks like we have a stable, complete system. And when you have a stable, complete system, it’s clearly time to overclock it until it breaks. The CPU heatsink remained quite cool throughout the torture test, and CoreTemp confirms relatively low temperatures on each core. This is a very good omen for future overclocking. We’ll do that tomorrow.


