Getting the Most Out of PNG
When it comes to image formats on the internet, it’s generally a three-way tie between JPEG, GIF, and PNG. Deciding which image format to use is relatively straightforward; you choose lossy JPEG when you’re saving continuous-tone photographic images, and you choose between lossless GIF or lossless PNG when you’re saving images with large blocks of the same or similar colors. See my comparison of GIF/PNG and JPEG if you’re not clear on what the difference is. But the choice between GIF and PNG is no contest. PNG is a more modern and vastly improved version of GIF that (almost) completely obsoletes it. You should always choose PNG over GIF, except in the following two circumstances:
- You want an animated graphic. PNG doesn’t support animation. GIF does.
- Your image is extremely small, on the order of a few hundred bytes. In my experience, GIF file sizes are smaller in this scenario.
In every other way, PNG is the natural heir to GIF. It’s copyright-free, it can store all bit depths, it can represent alpha channels, and it offers more efficient compression. But as great as PNG is, there are a few things you should know about PNG to get the most out of it.
Let’s start with a representative image. I took a quick screenshot of this website, along with all the browser chrome, transparency, and shadows. ClearType font rendering is on, and there’s a nice mix of text, graphics, and UI. It’s a perfect candidate for the lossless PNG file format, because there are large areas of the same colors and hard transitions between them. We want nice, crisp transitions between the white and dark areas of the screenshot.
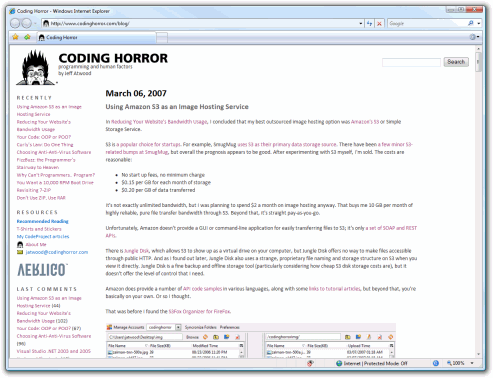
The actual size of the screenshot is 1233 x 946. When I save this file directly from Paint Shop Pro as a 24-bit PNG file, I get the following file sizes:
| PNG, interlaced | 288 KB |
| PNG, non-interlaced | 212 KB |
So here’s our first lesson: never save interlaced PNG files.
- Interlaced PNGs are 35% larger for the single purpose of progressive rendering.
- Progressive rendering is confusing; the image gets less and less blurry over time. As Philip Greenspun so aptly pointed out, readers can’t tell when an image is “done.”
- Standard PNGs have a perfectly acceptable progressive rendering solution without interlacing. They render in obvious and simple fashion, from top to bottom.
212 KB is an impressively small filesize for such a large and detailed image. It’s a testament to the efficiency of the PNG image format. But we can do better. If we run Ken Silverman’s PNGOUT* on the files, we can crunch them down even smaller:
| PNG, interlaced | 190 KB |
| PNG, non-interlaced | 190 KB |
First, note that PNGOUT strips out any interlacing. If you have interlaced PNG images, you can expect a very substantial reduction in file size. But even without interlacing, PNGOUT reduces the file size by 22 KB, or nearly 10 percent. I know it doesn’t sound like much, but PNG is by definition lossless compression. JPEG is lossy, so as file sizes decrease, more and more of the image is lost. With PNG, we haven’t lost any detail in our images, we’ve just made them smaller. Folks, this is free bandwidth! It doesn’t get much better than that.
To see how effective PNGOUT really is, I ran it on a subset of my /images folder. The trick here is that these images are already optimized; I run OptiPNG on every file in this folder periodically.
| OptiPNG | PNGOUT | |
| 267 PNG files | 4.40 MB | 4.04 MB |
It took a while to run, but we get a further 9% reduction in PNG image size beyond what OptiPNG could do. How is this possible?
I thought the name Ken Silverman sounded familiar. Ken, the author of PNGOUT, is the wunderkind behind the original Duke Nukem 3D build rendering engine, which he wrote at the age of 18.
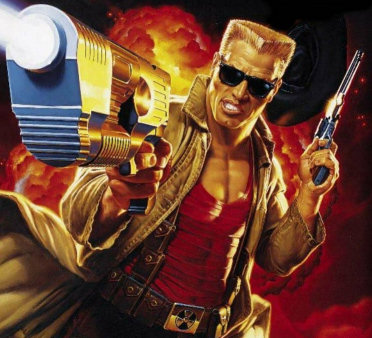
Ken is so good, even John Carmack – the author of Doom and Quake, who is widely regarded as a programming god – respects him. No wonder his little PNG optimizer decimates all the other ones. Always bet on Duke.
If you’re running a website of any size, and you use PNG images in any quantity, you should run them through PNGOUT to reduce their size. PNGOUT can also convert your existing GIF images to the superior PNG format along the way. And it’s so easy to do; here’s the Windows command prompt syntax to optimize all PNG images in a folder:
for %i in (*.png) do pngout “%i” /y
The PNGOUT optimization process isn’t particularly speedy, but it hardly matters. This one-time optimization could reduce your image bandwidth usage from 10 to 30 percent. That’s an offer I can’t refuse.
*Thanks to Kevin Breitenstein for pointing this out to me